After water damage, mold spores, which are always present in the air, can begin to grow into visible mold colonies in as little as 24 to 48 hours. Mold spores are everywhere in the environment, and when they encounter moisture, warmth, and a food source (such as organic materials like wood, paper, or drywall), they can rapidly colonize and spread. The speed of mold growth depends on factors such as the extent of moisture, temperature, and the type of material affected.

The Dynamics of Mold Growth
However, the rate of mold growth can be influenced by several factors:
- Type of Surface: Mold prefers porous materials like wood, drywall, and carpeting, which can absorb and retain moisture, creating an ideal breeding ground for mold. On the other hand, non-porous materials such as glass and metal are less hospitable to mold growth due to their inability to hold moisture.
- Moisture Levels: The level of moisture present in a material is directly proportional to the speed of mold growth. Higher moisture levels facilitate faster mold growth.
- Temperature: While mold can grow in a wide range of temperatures, it thrives between 70°F (20°C) and 90°F (32°C). Some mold species can survive in extreme temperatures as low as 32°F (0°C) or as high as 120°F (49°C).
Identifying Mold Growth
Prompt detection of mold can help prevent extensive damage and expensive repairs.
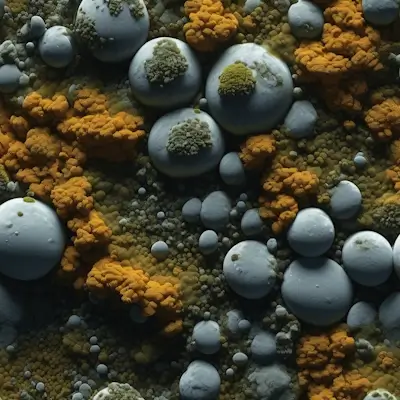
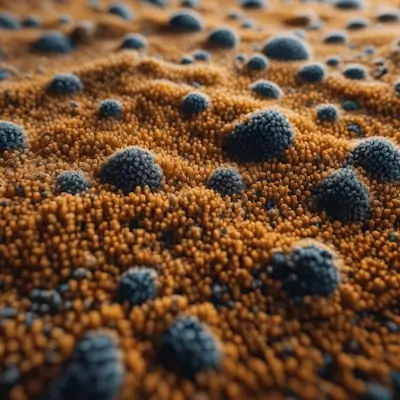
- Visible Mold: Mold colonies can appear in various colors, including black, white, green, or others, and may have a fuzzy or slimy texture.
- Odor: Mold often emits a distinctive musty odor, which can be the first indication of a hidden mold problem.
- Health Symptoms: Mold exposure can lead to health issues such as allergies, respiratory problems, and other symptoms. If these symptoms are noticed, especially in conjunction with other signs, it may indicate the presence of mold.
In the next section, we will discuss the steps to take if mold growth is suspected and how to prevent future mold growth.
How to Check for Mold After Water Damage
Step 1: Safety First
Before starting your inspection, it’s crucial to protect yourself. Mold exposure can lead to health issues such as allergies and respiratory problems. Wear protective gear including gloves, a mask, and safety goggles to prevent direct contact with mold and inhalation of mold spores.
Step 2: Identify Common Areas
Mold is most likely to grow in areas that are frequently exposed to moisture. This includes:
- Basements: Basements can be prone to humidity and leaks.
- Kitchens and Bathrooms: These areas are frequently exposed to water and steam.
- Around Windows and Roofs: Leaks in these areas can lead to water accumulation.
- Pipes: Leaky pipes can cause water damage and subsequent mold growth.
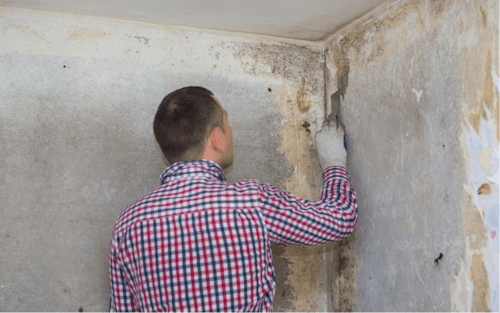
Step 3: Look for Visible Signs
Visible mold growth can vary in appearance. It may look like a fuzzy or slimy patch and can be in various colors, including black, white, green, or others. It may also appear as a stain, discoloration, or speckled pattern on surfaces.
Step 4: Use Your Nose
Mold often produces a musty odor that can be quite distinctive. If you notice an unusual smell, particularly in a damp area, it could be a sign of mold.
Step 5: Check for Water Damage
Signs of water damage can often indicate the presence of mold. This includes:
- Stains or Discoloration: Water stains on walls, ceilings, or floors can be a sign of a leak and potential mold growth.
- Peeling Paint or Wallpaper: This can be a sign of ongoing moisture issues and potential mold growth.
- Warped Walls and Floors: Water damage can cause materials to warp, which can be a sign of a serious water and mold issue.
Step 6: Consult a Professional
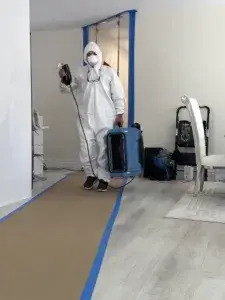
If you find signs of mold or if you’re unsure, it’s best to consult a professional. Mold can be difficult to completely remove, and if left untreated, it can continue to grow and cause damage. Professionals have the necessary tools and expertise to ensure the mold is thoroughly removed and to address the underlying issues causing mold growth.
Detailed Steps to Take When Suspecting Mold Growth
Step 1: Identifying the Source of Moisture
The first step in addressing mold growth is identifying the source of moisture.
- Leaky Pipes: According to the Environmental Protection Agency (EPA), household leaks can waste nearly 10,000 gallons of water each year. These leaks often go unnoticed and can lead to mold growth.
- Roof Leaks: Damaged or missing shingles can allow water to seep into your home, creating a perfect environment for mold.
- High Humidity: In areas with high humidity, like bathrooms or basements, condensation can accumulate and promote mold growth. The EPA recommends keeping indoor humidity below 60%, ideally between 30% and 50%.
Step 2: Containment
Once you’ve identified the affected area, the next step is to prevent the spread of mold spores to other areas of your home.
- Sealing Off the Area: Use heavy-duty plastic sheeting and secure it with duct tape to create a barrier.
- Turning Off HVAC Systems: Mold spores can travel through your home via the HVAC system. Consider turning it off during the remediation process.
Step 3: Consult a Professional
Mold remediation can be a complex process. If not done correctly, it can lead to further damage and even cause the mold to return. That’s why, it’s highly recommended to consult a professional.
- Professional Inspection: A professional can conduct a thorough inspection using tools like moisture meters and infrared cameras. At 24/7 Service Pros we provide free mold inspection.
- Professional Remediation: According to HomeAdvisor, the average cost of mold remediation is between $1,115 and $3,334. While this might seem high, the cost of not addressing a mold problem can be much higher.
How Can I Test for Mold in My Home?
Testing for mold in your home can be done using a mold test kit or by hiring a professional mold inspector.
Using a Mold Test Kit
- Purchase a High-Quality Test Kit: Many companies make mold testing kits, but not all are equally effective. The Pro-Lab Mould Test Kit, the Mould Armour DIY kit, and the EDLab Evalu-Aire Basic kit are brands to take into account.
- Conduct Surface Testing: The package includes a variety of swabs that you may use on wood furniture and worktops, as well as tape that you can use to collect samples from draperies and carpets.
- Perform Air Testing: Your kit will include materials to collect mold samples from the air in your house. The lab you submit the kit to will next analyze it under a microscope.
Remember, while some molds are more harmful than others, nearly all kinds of mold will pose a health risk. Therefore, if you suspect the presence of mold in your home, it’s best to consult a professional. They have the necessary tools and expertise to ensure the mold is thoroughly removed and to address the underlying issues causing mold growth.
Will Mold Continue To Grow After Water Damage Has Been Addressed?
Understanding the behavior of mold after water damage has been addressed is crucial in mold management and prevention. Let’s delve into this topic:
Mold and Moisture: An Inseparable Pair
Mold, a variant of fungus, thrives mostly in moist surroundings. When an area of your home experiences water damage, it creates the perfect conditions for mold to grow. However, what happens when the water damage has been addressed?
Post Water Damage: The Scenario
Once the water damage has been addressed, meaning any leaks have been fixed and the area has been dried out, the conditions for mold growth are significantly reduced. However, this does not necessarily mean that all mold growth will immediately stop.
The Persistence of Mold
Mold is tenacious. If the area is not properly cleaned and dried after fixing the water damage, some moisture may remain, providing a conducive environment for mold to continue growing. Furthermore, if there are any undetected sources of moisture, such as hidden leaks or high humidity, mold may continue to grow.
The Role of Professional Mold Remediation
This is why professional mold remediation is often necessary after water damage. Mold remediation professionals have the tools and expertise to not only remove existing mold colonies but also address the underlying issues causing mold growth. This includes thoroughly drying the area, treating it with antimicrobial agents to prevent future mold growth, and addressing any humidity issues.
The Timeline of Mold Visibility: An In-Depth Analysis
When it comes to mold growth, understanding the timeline is crucial. Specifically, knowing how long it takes for mold to become visible can help in early detection, thereby mitigating potential health risks and property damage.
The Initial Phase: Invisible Growth
Mold growth can commence as early as 24 hours after a material has been exposed to a moisture source, provided the conditions are right. However, this starting growth will not easily be visible to the naked eye. These are microscopic mold spores that begin to colonize the material.
The Colonization Process: Invisible to Visible
The colonization process, where the mold begins to grow and multiply, can take anywhere from 3 to 12 days. During this time, the mold is still not typically visible to the naked eye. It’s during the late stages of this colonization process that the mold starts to form a colony large enough to become visible.
The Visible Phase: Mold Comes into Sight
In general, mold can become visible to the naked eye in about 18 to 21 days after the initial exposure to moisture. However, this timeline can vary depending on several factors. These include the species of mold, the type of material it’s growing on, and the amount of moisture present.
Stage Timeframe Visibility
| Stage | Timeframe | Visibility |
|---|---|---|
| Initial Growth | 24 hours | Invisible |
| Colonization Process | 3 to 12 days | Invisible to Visible |
| Visible Phase | 18 to 21 days | Visible |
Please note that these timeframes are approximate and can vary depending on several factors, including the type of mold, the material it’s growing on, and the amount of moisture present. Always consult a professional if you suspect mold growth in your home.
The Role of Moisture: A Key Factor
It’s important to remember that the longer moisture is present, the greater the chance for mold to grow and spread. Therefore, if you suspect water damage, it’s crucial to address it promptly to prevent potential mold growth.
Conclusion: Prevention is Key
In conclusion, understanding the timeline of mold visibility and the steps to take when mold growth is suspected is crucial in managing and preventing mold issues. Mold can start growing as early as 24 hours after exposure to moisture, but it typically becomes visible to the naked eye around 18 to 21 days later. This timeline can vary based on several factors, including the type of mold, the material it’s growing on, and the amount of moisture present.
Even after water damage has been addressed, mold may continue to grow if the area is not properly cleaned, dried, and treated. Therefore, professional mold remediation is often necessary to ensure the complete removal of mold and the prevention of future growth.
Regular inspections, prompt action at the first sign of water damage, and maintaining a dry and well-ventilated environment can help keep your home mold-free. If mold is suspected, it’s important to consult a professional to ensure proper and safe removal.
Remember, when it comes to mold, a proactive approach is always better than a reactive one. Stay vigilant, act promptly, and don’t hesitate to seek professional help when needed. Your home is your sanctuary, and with the right knowledge and resources, you can keep it safe and mold-free.